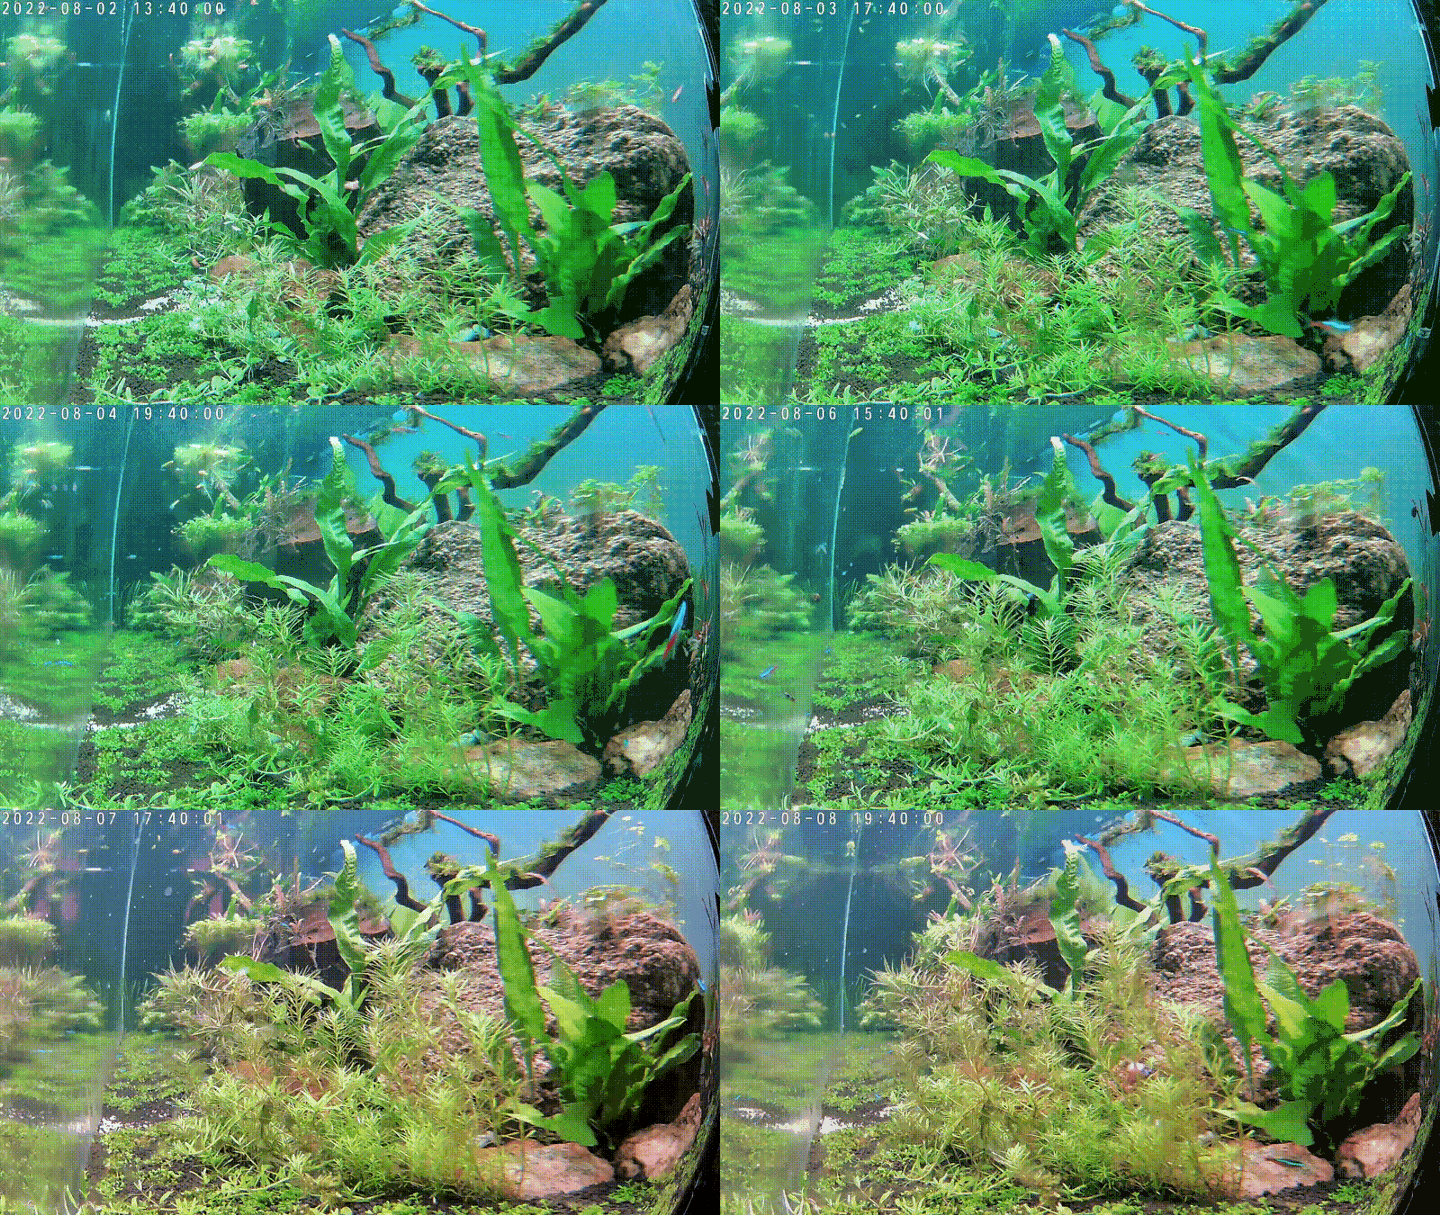
Planted Aquarium — Automated Time Lapse

Just Planted Aquarium? NO. You can create a TimeLapse Video for every use-case you can think of. Today, I will show you how I created an Automated TimeLapse for my Planted Aquarium.
Here is the latest TimeLapse : https://github.com/amithgc/aquarium-photos/blob/main/gif/animation.gif
Before you Start
Before you start, you would need the following…
- A Camera : To capture the Images
Yes, You will need a camera. I used a TP-LINK 3MP (Tapo 110) . You can use any camera you like, Make sure there is a way to capture an image or at-least the camera supports RTSP protocol. In this article we would be using ffmpeg to capture the image from RTSP Stream.
- GitHub Account : To store the Images
You will need a place to store these images, I opted for GitHub ( 🧑💻 ). We would also be using GitHub Actions to write scripts to Generate TimeLapse Videos and GIF Animations. Alternatively, you can just use your machine to store images and generate images.
Configuring the Camera
I cannot speak for all the cameras available in the market. Lets look at the configurations required in Tapo 110
Firstly, Setting up the camera should be straightforward. You can refer to the camera manual. Then you need to enable RTSP and generate credentials to access the same.
Open the Camera, Tap on Settings, Go to Advanced Settings and then Navigate to Camera Account. Provide a UserName and Password. You will have to use this username and password to access the RTSP Video Stream.
Also, make sure you know the IP address of your camera. You will get it in your router config.

RTSP Video Stream
What is RTSP?
Real Time Streaming Protocol (RTSP) is an application-level network communication system that transfers real-time data from multimedia to an endpoint device by communicating directly with the server streaming the data.
RTSP started as a way to allow users to play audio and video straight from the internet, rather than having to download media files to their devices. The protocol has been applied for various uses, including internet camera sites, online education and internet radio.
Check If your RTSP is working. If you are using Tapo 110 camera, Your RTSP stream will be available at
rtsp://username:password@<YOUR CAMERA ID>:554/stream1 |
Example: rtsp://admin:admin@192.168.1.106:554/stream1
You can even load this URL in VLC Player and watch the Video Stream. In VLC, Click on Open Network and paste the URL

Now you need a way to capture a frame from this Video stream automatically. There are multiple ways of doing this. If your camera has a URL which returns an image directly. Then you can use it. In our case we will be using ffmpeg to capture a frame from RTSP Stream.
ffmpeg -i rtsp://username:password@192.168.1.106:554/stream1 -y -f image2 -frames:v 1 capture.jpg
At this point you have an image “capture.jpg”. You can automate this script in crontab.
Push Captured Image to GitHub
Once you have an Image, You need to push it to GitHub. We will be using GitHub API to push the image. Before this, Create a Project in GitHub and create an images folder inside it. We will be pushing all our images into this folder.
You will also need a GitHub Personal Access Token, and here is how you will be able to generate it.
#!/bin/bash


# Generate a Github Personal Access token and use it here
API_TOKEN="<YOUR GITHUB TOKEN>"

#Update the URL Below
GITHUB_URL="https://api.github.com/repos/<USER NAME>/<REPO NAME>"

# Getting the Base64 for your image
base64Data=$( base64 Capture.jpg )

#Getting the current timestamp to rename your uploading image
timestamp=$(date +%s)

#Uploading the Image
curl --location --request PUT $GITHUB_URL'/contents/images/'$timestamp'.jpg' \
--header 'Authorization: token '$API_TOKEN \
--header 'Content-Type: text/plain' \
--data-raw '{"message":"Image Pushed","committer":{"name":"Amith","email":"octocat@github.com"},"content":"'$base64Data'"}'
Build Video and GIF animation
At this point you have your images getting uploaded to GitHub, Now you can use GitHub Actions to create a Video and GIF Animation automatically.
Refer to this GitHub Project, I have all the setup ready here. Please follow the Structure of the project.
Here is the GitHub Action File
name: Generate Video
on:
  schedule:
    - cron: '0 0 * * *'

  # Allows you to run this workflow manually from the Actions tab
  workflow_dispatch:

jobs:
  generate-video:
    runs-on: ubuntu-latest
    steps:
      - uses: actions/checkout@v2
      - name: Setup ffmpeg
        uses: FedericoCarboni/setup-ffmpeg@v1-beta
        id: setup-ffmpeg
      - name: Generate Video
        run: ffmpeg -y -framerate 10 -pattern_type glob -i "images/*.jpg" -c:v libx264 -crf 0 ./videos/video.mp4
      - name: Generate Gif
        run: ffmpeg -y -i ./videos/video.mp4 -vf scale=800:-1 -r 10 ./gif/animation.gif
      - name: Generate HD Gif
        run: ffmpeg -y -i ./videos/video.mp4 -vf scale=2304:-1 -r 10 ./gif/animation-HD.gif
      - name: Check to see if a new video file has been created
        id: changes
        run: |
          git add -N .
          echo "::set-output name=count::$(git diff --name-only | wc -l)"
      - name: Commit files
        run: |
          git config --local user.email "41898282+github-actions[bot]@users.noreply.github.com"
          git config --local user.name "github-actions[bot]"
          git add ./videos/*
          git add ./gif/*
          git commit -m "Video Generated, Automated" -a
        if: steps.changes.outputs.count > 0
      - name: Push changes
        uses: ad-m/github-push-action@master
        with:
          github_token: ${{ secrets.GITHUB_TOKEN }}
          branch: ${{ github.ref }}
        if: steps.changes.outputs.count > 0
This Github WorkFlow will execute everyday, It will pickup the files in /images folder and uses ffmpeg to generate Video and GIF Animation.
Feel free to use this anywhere you like…. also, visit My GitHub Project to see this in action.

